Setup camera
In this step, the camera can be set up, aligned and calibrated.
-
Focussing: Initial alignment and setup of the camera during installation.
-
Align the camera to the feeder.
-
Orienting the camera towards the bunker.
-
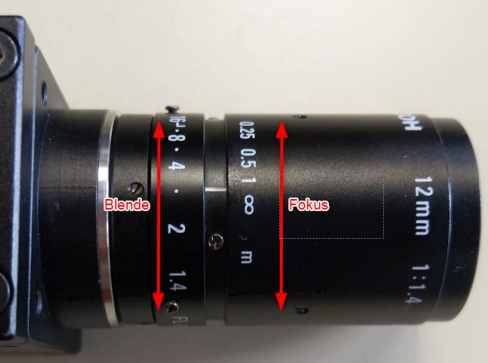
Setting the aperture and focus on the lens.
-
-
Camera calibration: Compensating for camera distortion
-
Calibrate the camera using a calibration plate.
-
-
Illumination: Adjust the illumination and image brightness to the part to be searched for.
-
Activate front light and back light for the inspection programme.
-
Setting the image brightness for front light and back light.
-
Important: Check from the camera device whether the defined working distance (measured between the calibration plate and the lower edge of the lens) is correct for the feeder to camera combination.
Menu
Procedure
-
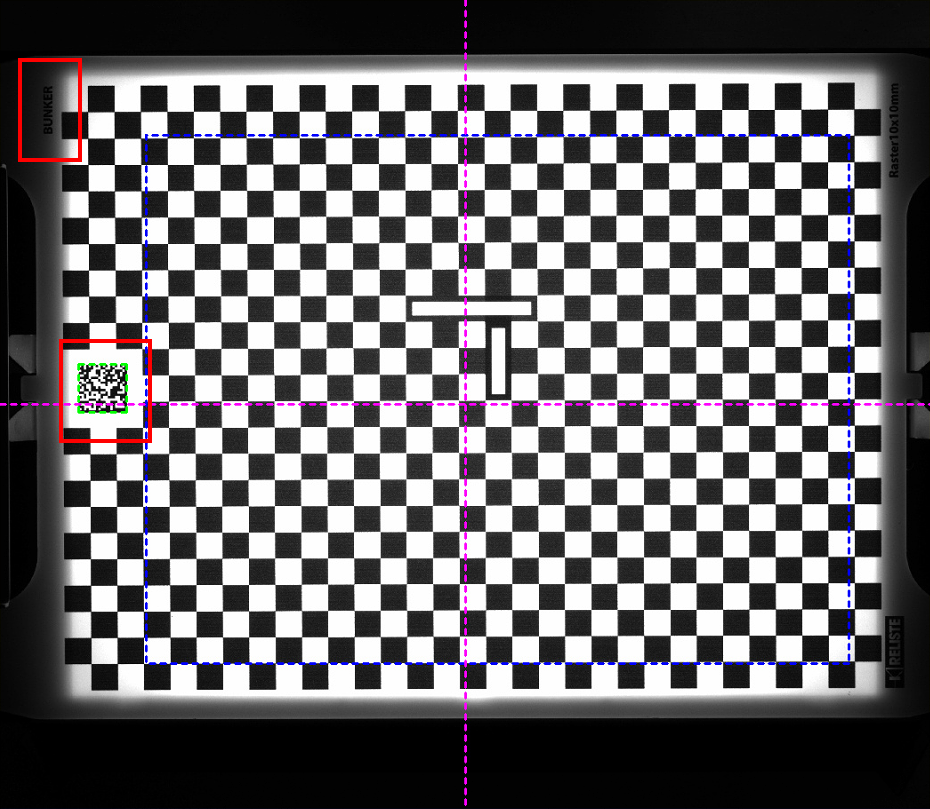
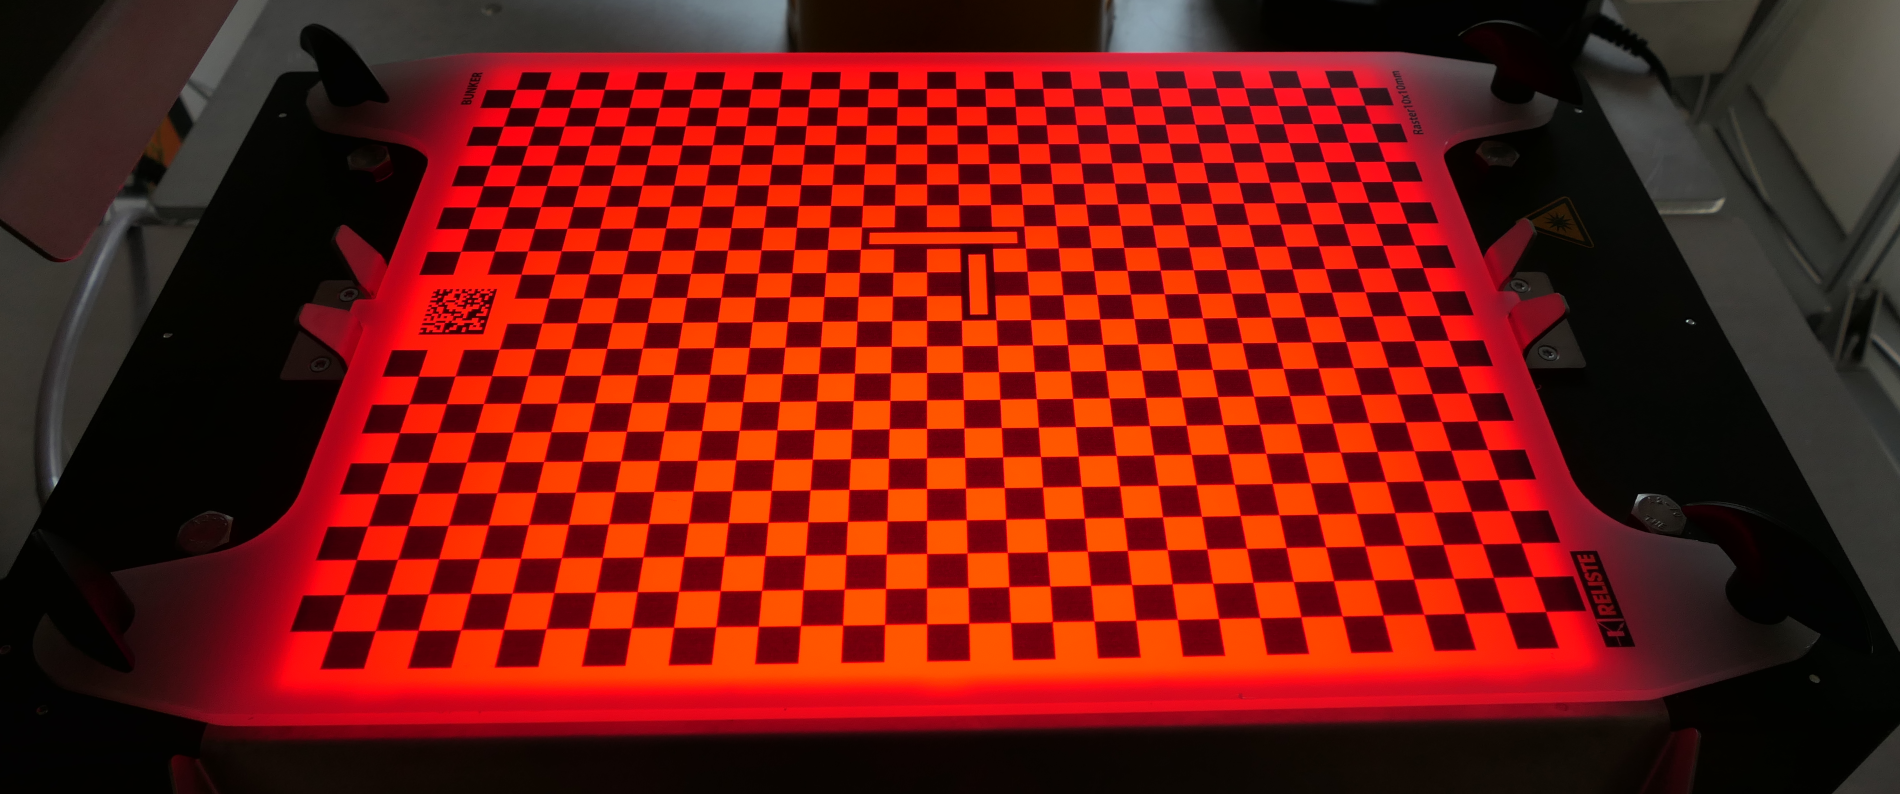
Fit the supplied calibration plate to the feeder system. When aligning the calibration plate, pay attention to the " Bunker" labelling; this side should be aligned in the direction of the feeder.
-
Before fixing the lens, set the aperture ring of the lens to 5.6 and fix it with the locking screws.
-
Open the fixing screws of the focus ring on the lens.
-
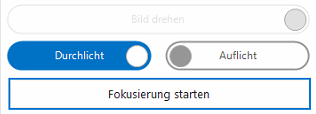
Start the focussing process.
-
The camera automatically adjusts the exposure time during focussing.
-
Setup the camera so that it is mounted plumb and the calibration plate appears in the centre of the image.
-
Check that the data matrix code and the bunker labelling are visible on the left-hand side of the wizard.
-
If the labelling is visible on the right-hand side of the image, use the "Rotate image" option to move the labelling to the left-hand side.
Important: This step is particularly important for the integrated control loops of the Smart Sequences!
-
If the labelling is at the top or bottom of the image, the camera must be mechanically rotated by 90°.
-
-
Adjust the focus by slowly turning the focus ring on the lens until the image appears sharp.
-
You can zoom in or out of the image using the mouse wheel or right mouse button ("Zoom in", "Zoom out").
-
The focus feedback display can be used as an orientation for maximum sharpness. At the point of maximum sharpness, the bar shows the highest deflection. This does not have to be at 100%!

-
The area for calculating the focus feedback can be changed using the blue rectangle in the image.
-
-
Fix the focus ring with the fixing screws
Camera calibration is used to compensate for lens distortion and is mandatory for operation.
Information: The calibration must be performed again if the camera is mechanically modified.
Procedure
-
Fit the supplied calibration plate to the feeder system. When aligning the calibration plate, pay attention to the "Bunker" labelling; this side should be aligned in the direction of the feeder.
-
Start the calibration with "Recalibrate". The process runs completely automatically.
-
After calibration, check the calibration error Rms (Unit: pixels). This must be less than or equal to 1,500.

Important: If the error is too large, then the camera is not plumb and is mounted at an angle.
Information: The camera calibration is saved automatically and applies to all inspection programmes!
Optional steps when using height correction
If the height correction is used for parts, the following values must also be entered
-
the working distance
 between the upper edge of the calibration plate and the lower edge of the lens in millimeters
 -
the thickness of the calibration plate
 in millimeters
Here, the lighting is adapted to the current inspection programme ( part to be inspected). Depending on the part, backlight and/or front light can be used for the inspection.
Information: The front illumination is an optional extension and is not available on all systems.
Menu
Procedure
-
Fit the feeder container and make sure that it is securely screwed in place.
-
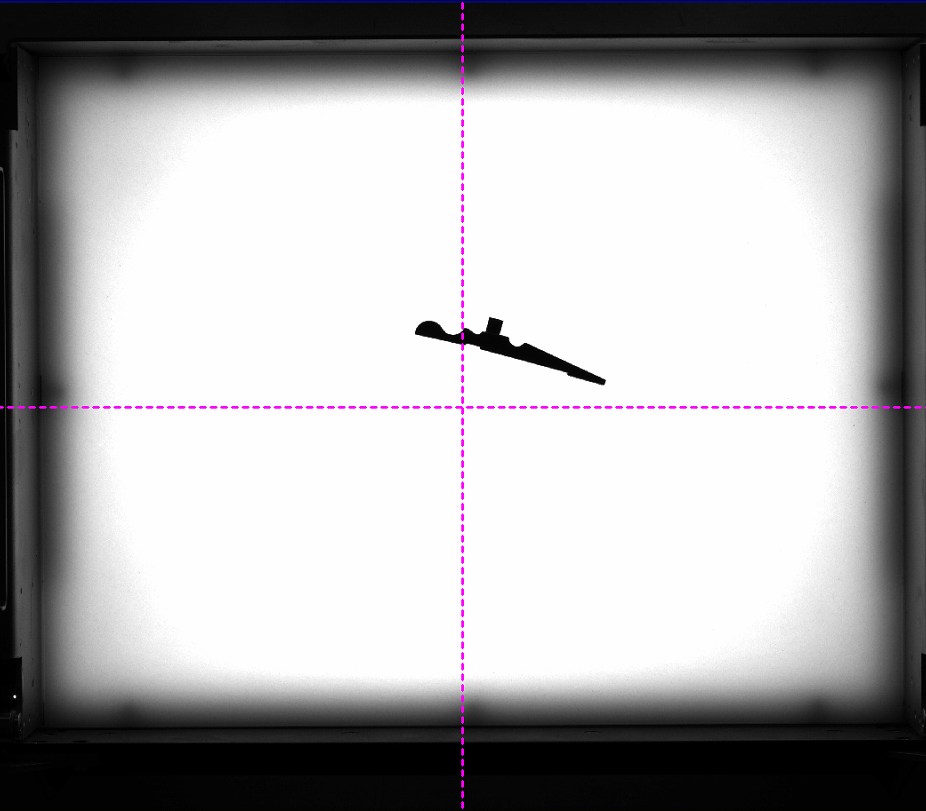
Place a part in the correct position in the centre of the container.
-
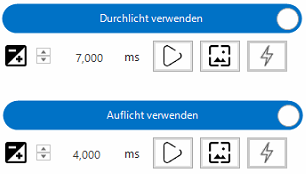
Activate the desired lighting "Use backlight" or "Use frontlight".
-
Live playback
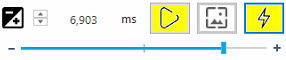
 can be started with the Play symbol.
 -
Use the input field
 to change the exposure time (brightness) so that the features of the part are clearly visible.
 -
Automatic exposure
 can be activated for support.
-
This displays an orange area in the image.
-
The exposure time is calculated automatically in this area.
-
The target brightness can be set using the slider
-
The area without a part in the backlight should not be too dark, for example: